Welcome to our blog.
Firstly, welcome to our first blog post. We are really excited to share with you MORE of what the Studio Durham House has to offer.
For those visiting us for the first time, THE STUDIO at Durham House Chiropractic Clinic in Farnham is a large, bespoke studio offering the highest quality core,
pilates, yoga,
stretch and
balance classes. THE STUDIO environment is clean, warm, bright and inviting.
In our blog we will be discussing all things studio. Including Yoga, Pilates, BARRE concept and our very own flexicore. In addition, if there is anything you would like us to talk about, please email thestudio@durhamhousechiropractic.co.uk.
First things first.
So, first things first. Earlier this week on our Facebook page we discussed some Yoga poses that we believe are perfect to help flexibility and stability of the ankles, which i might add, is our main topic during February. Therefore if you do follow us on Facebook or Instagram, you will notice lots of information about feet and ankles from both our Studio and our Clinic.
Yoga for the ankles part 1.
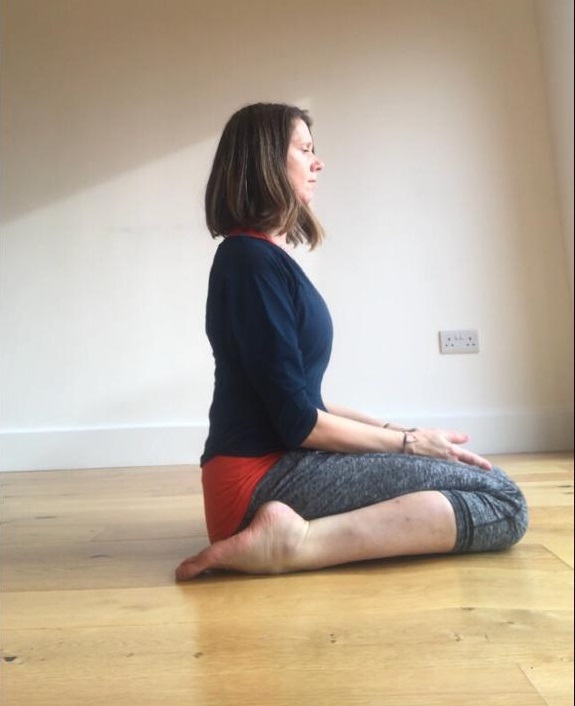
Today we discuss Virasana or Hero pose in more detail.
To complete the pose, Kneel on the floor (use a folded blanket or bolster to wedge between your calves and thighs if necessary), with your thighs perpendicular to the floor, and touch your inner knees together. Slide your feet apart, slightly wider than your hips, with the tops of the feet flat on the floor. Angle your big toes slightly in toward each other and press the top of each foot evenly on the floor.
Exhale and sit back halfway, with your torso leaning slightly forward. Wedge your thumbs into the backs of your knees and draw the skin and flesh of the calf muscles toward the heels. Then sit down between your feet.
If your buttocks don’t comfortably rest on the floor, raise them on a block or thick book placed between the feet. Make sure both sitting bones are evenly supported.
Allow a thumb’s-width space between the inner heels and the outer hips. Turn your thighs inward and press the heads of the thigh bones into the floor with the bases of your palms. Then lay your hands in your lap, one on the other, palms up, or on your thighs, palms down.
Firm your shoulder blades against the back ribs and lift the top of your sternum like a proud warrior. Widen the collarbones and release the shoulder blades away from the ears. Lengthen the tailbone into the floor to anchor the back torso.
At first stay in this pose from 30 seconds to 1 minute. Gradually extend your stay up to 5 minutes. To come out, press your hands against the floor and lift your buttocks up, slightly higher than the heels. Cross your ankles underneath your buttocks, sit back over the feet and onto the floor, then stretch your legs out in front of you. It may feel good to bounce your knees up and down a few times on the floor.
Beginner’s Tip – Often the inner top feet press more heavily into the floor than the outer top feet. Press the bases of your palms along the outer edges of the feet and gently push the pinky-toe sides of the feet to the floor. If your ankles are painful in this pose, roll up a towel and place it underneath them before you sit back.
The benefits are endless.
The benefits of this pose include
- stretching the thighs, knees, and ankles.
- Strengthening the arches.
- Relieving the symptoms of menopause.
- Reducing swelling of the legs during pregnancy (through second trimester) and is therapeutic for high blood pressure and asthma.
Caution – If you have heart problems or a knee/ankle injury please check before attempting this pose.
If you are looking for some variations then clasp your hands, extend your arms forward (perpendicular to your torso and parallel to the floor), turn the palms away from your torso (so the thumbs point to the floor), then raise the arms on an inhalation perpendicular to the floor, with the palms facing the ceiling. Stretch actively through the bases of the index fingers.
Credit – Yoga Journal
Photo credit – Vic Williams
Keep coming back every month where we will be discussing all things Studio.
See you soon.
The Studio Durham House Team.

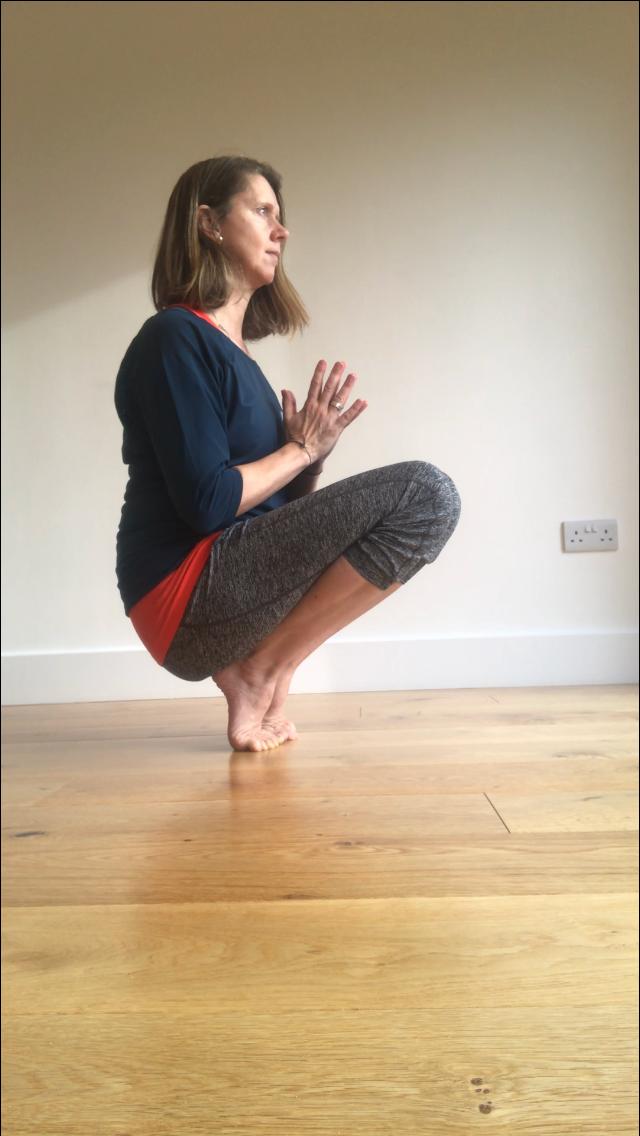
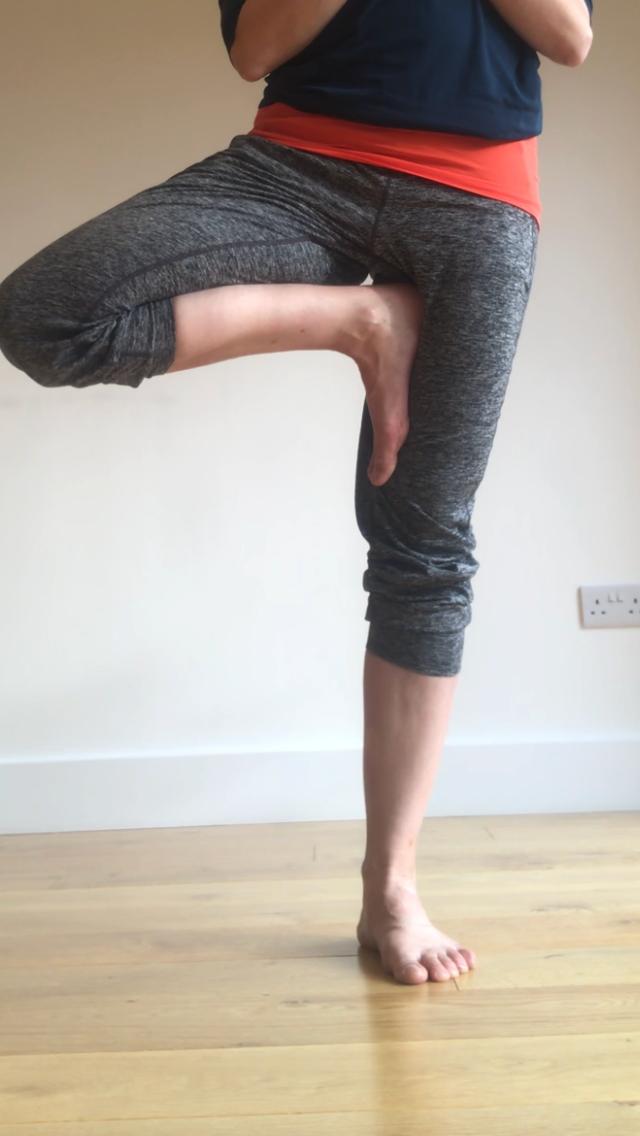
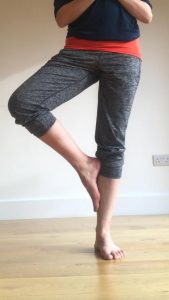
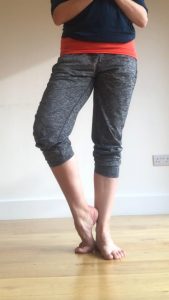
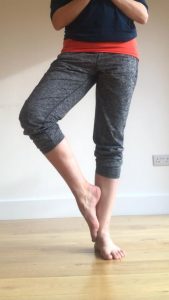
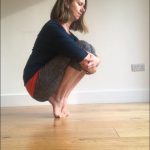 There are different variations of this asana. In the most commonly described version, the body balances on the toes with the heels lifted, then one leg is lifted and taken into lotus pose with the palms brought together in front of the heart.
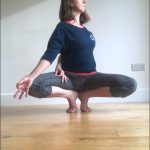 In another variation of prapadasana, both feet remain on the ground and the hips simply rest on the heels as the yogi balances on the toes. The hands may be brought into prayer position then lifted over the head. The knees can be kept together or taken wide apart.